I live with my husband and my 22 year old daughter. My husband is pretty useless in giving me feedback on things I make, mostly because he enthusiastically proclaims “It’s beautiful! So pretty!” about EVERY SINGLE THING I show him. The daughter is good at giving feedback about what 22 year olds like, but unfortunately for me it is usually big chunky pieces that are basically just STRUNG. And right now, I’m not into ‘just strung’. I like to put a little time and effort into things, rather than just simply stringing some beads on a cord. I feel like I’m cheating! If I ever decide to actually try and sell some stuff, it will work in my favor that the pieces that the young girls seem to prefer are the easier, simpler things.
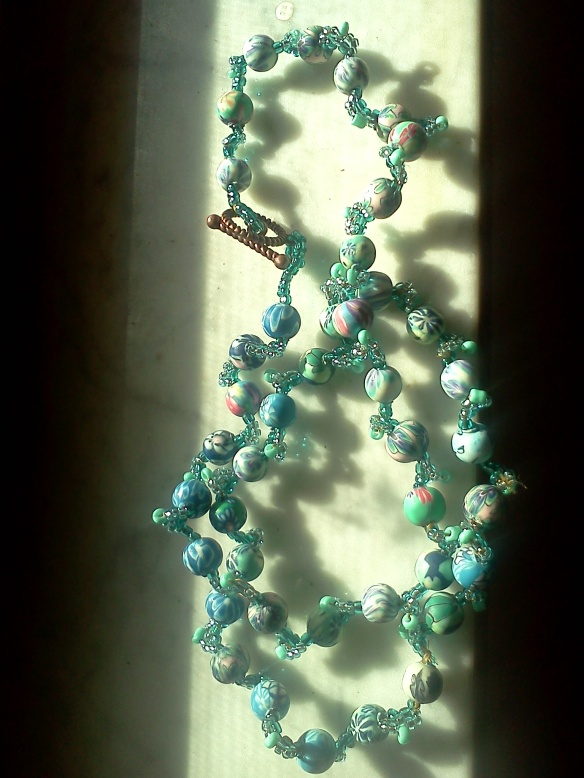
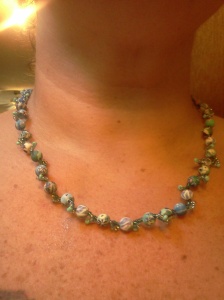
But to my point! My best gauge of things I make seems to be wearing pieces to work and seeing how many comments I get on it. I work with the public, I see hundreds of people every day. And when I wore the gold serpentine necklace to work last week, boy did I get a lot of comments on it! It does take a bit of time, but it can be done in one night ( my favorite time frame – some time required, but yet still the gratification of a finished piece that same night!). It is also very versatile – you can use any number of combinations of seed beads and 4mm’s.
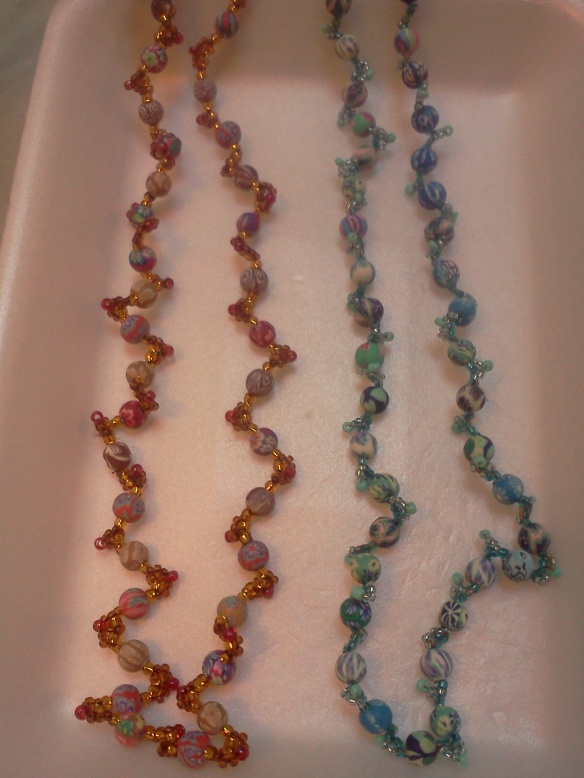
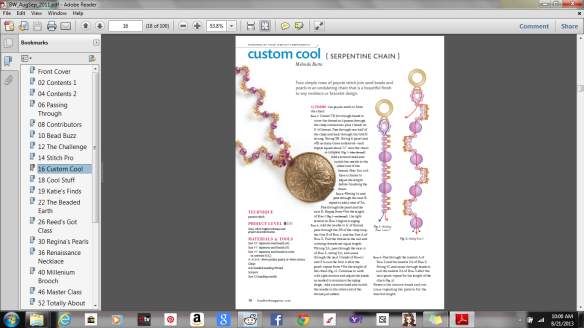
I used an article entitled “Custom Cool” from the August/September edition of Beadwork magazine which was a serpentine chain by Melinda Barta. I will post the screenshots below of the 2 page spread. The instructions call for 11/0 and 15/0 seed beads, and 4mm beads. I needed a project that was easy to remember and repetitive for a trip I was taking where I needed something to do. But I messed up and brought 8/0’s and 11/0s by mistake, and it came out just as nice, maybe even better! So you can use either 11’s and 15’s, or 8’s and 11’s on this project.
working the second pass of four….
On 6 feet of thread, center 5 11/0’s, half the clasp, 4 more 11/0’s. Cross through another 11/0 and knot the strings together. You will have 3 feet of thread on each string. Let one hang loose! You will be using the other thread to string 4 11/0s and one 4mm until you have the length you need. REMEMBER: this necklace will be bunching up, so you need to make it longer – each set of 4 seeds and one 4mm will make 3/8″ of finished necklace. I used 42 sets to make a 16″ finished piece. Add a stop bead when you reach the end, and move your needle to the other thread. ONE MORE NOTE: Usually instructions call for a certain length of thread and I have a ton left over; in this one I fell short every time so 6 feet is a CONSERVATIVE estimate…you may want to go a bit longer than 6 feet.
Finished passes one and two.
Now you are going to add a 15/0 between each 11/0 with the second piece of thread. For each set of 4 11/0’s, you will add 3 15/0’s. So go through the 4mm, through the first 11/0, then add a 15, go thru next 11, add a 15, go thru next 11, add a 15, then go thru the last 11, the next 4mm, the first 11 of the next set, and continue. Go all the way down. Time to get ANOTHER 6 feet of thread! Center it through the loop and clasp so that you have two more 3 foot pieces ready to go!
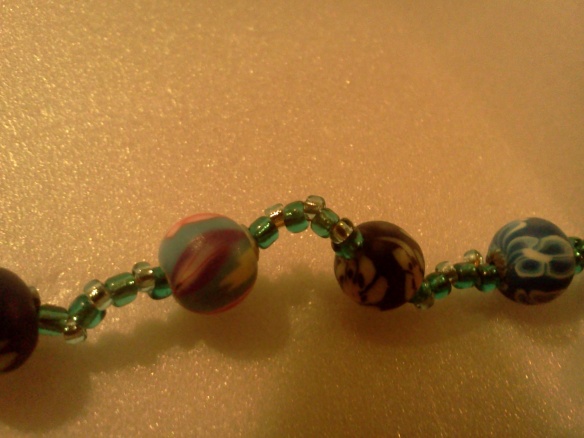
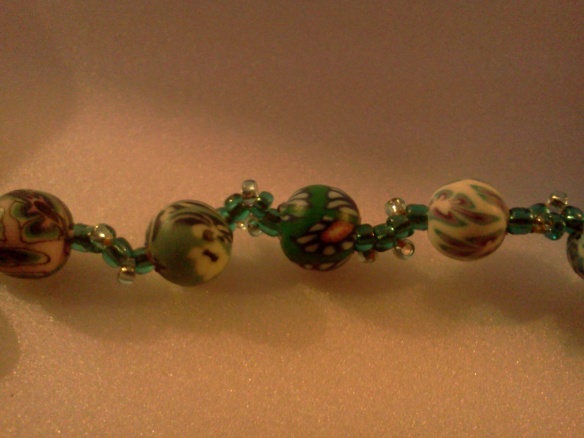
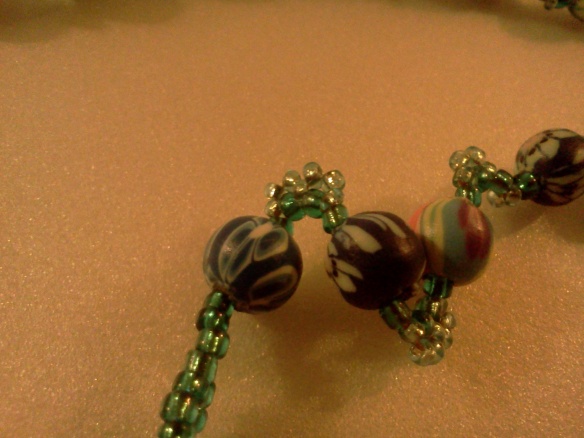
After pass 2 the necklace should start to zig a bit…
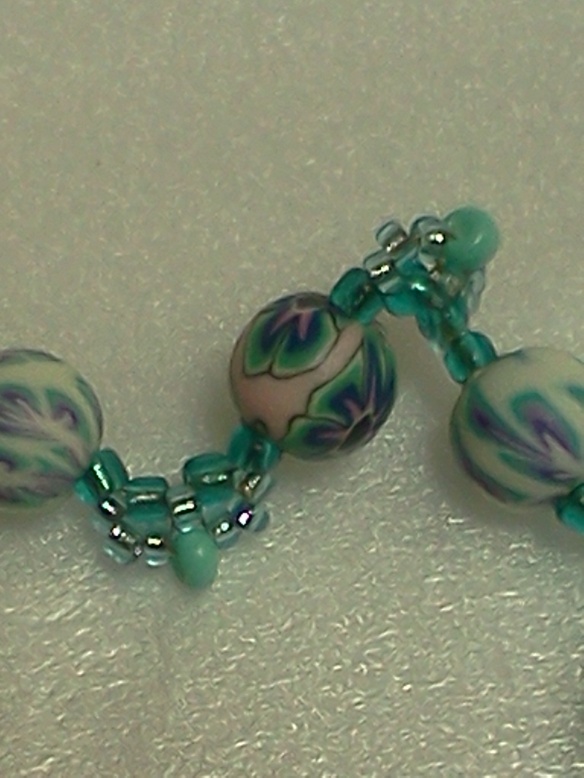
Pass number 3 – adding more 15’s between the 15’s that were added in pass 2
Thread number 3 will be adding 4 more 15’s to each set. You should have 4 11/0’s and 3 15/0’s in each set. We will now add 2 15’s between the first and second 15 of the set, and 2 more 15’s between the second and third 15 of the set. It sounds confusing but its really not. Go through the 4mm, the first 11, the first 15. Add two 15’s, and go through the second 15. Add two more 15’s and go through the third 15, the last 11, the next 4mm, and continue. If you look at the diagram on the screenshots below, you will say AHA. So when you finish the third pass, each set will have 4 11’s, and 7 15’s.
another look at pass number 3 – each set should have 4 11/0’s and 7 15/0’s.
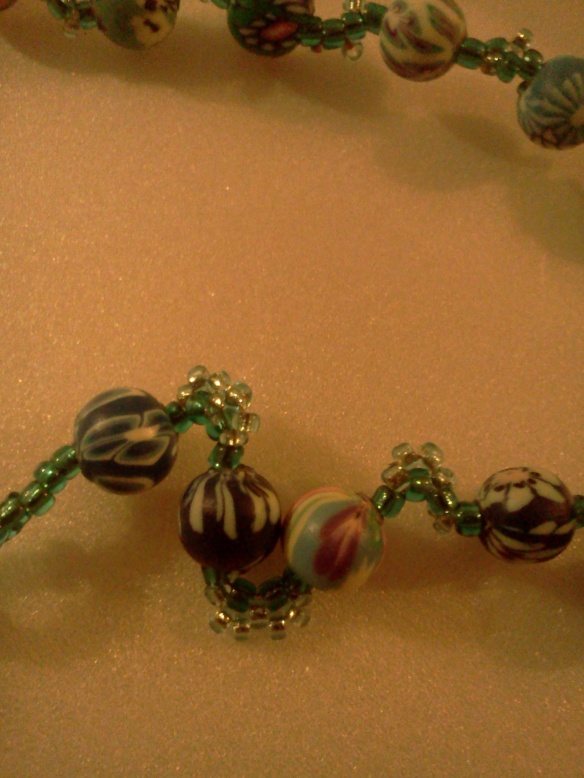
The final pass! Switch your needle to the last 3′ piece of thread. THIS time, the final addition is an 11/0, in a DIFFERENT but complimentary color, between the 2 sets of 15’s that you added last pass.
Last pass – add a different colored 11 between the 2 sets of 15’s that you added last pass.
So this time you will go thru the 4mm, thru the first 11, thru the first 15 of pass number 2, thru the first 2 15’s you just added. String your new 11. Then go thru the second set of 15’s you just added, the last 15 from pass 2, the last 11, and the next 4mm. WHEW! Things start getting snug here, but the necklace really should be zig zagging pretty good by now.
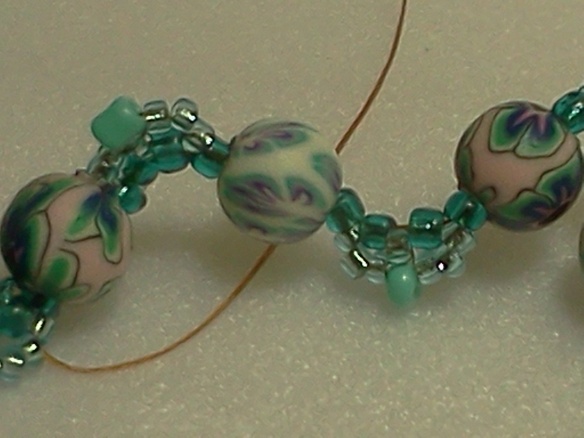
another look at pass number four
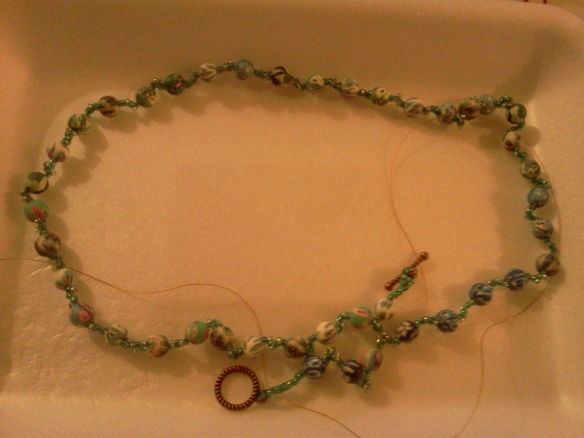
Finally check the length, if you want to add to it you can totally do that now. Otherwise make the other loop and clasp and trim away!
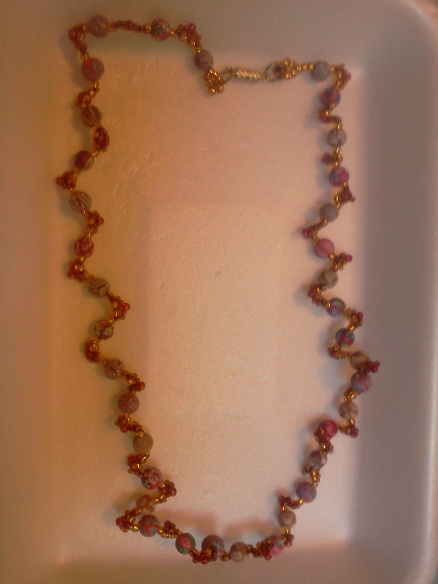
gold serpentine necklace using 8/0’s and 11/0’s. And 6mm polymer beads.
So that’s it….I used some 6mm polymer clay beads from Ali Express – 200 polymer beads for under $4 – they are so cute, too. They look hand rolled (slightly imperfect) which adds to their charm, imo.

And here are the screen shots to the actual article:
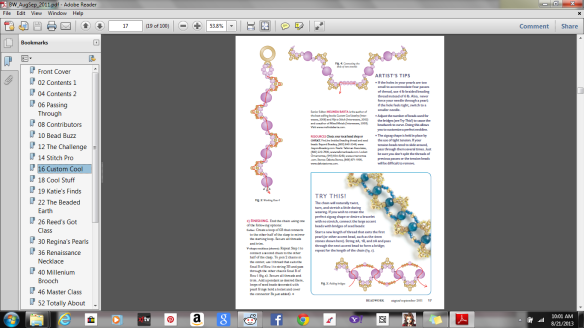
These instructions also have an option to make two separate chains, each one a half of the necklace, which you then join together with a pendant or drop in the center. That’s what I am going to try today!